A couple of weeks ago, we moved into our new place just down the way from our previous rental. We've been settling in, still sometimes discovering unpacked boxes hidden in our closets, and this weekend we turned our attention to the backyard.
When we moved, we brought almost all of our plants from the previous place with us since most of them were in pots. Seeing all of the plants in a big pile made me realize how many plants I really have! It took multiple car trips to get them to the new place, and when we unloaded them, we set them on some cement along the side of the house. I rearranged them over the last couple weeks and have been watering them, but because they're on cement, they dry out much more quickly than when the plants were sitting on dirt previously. I put some of them on plant saucers or greenhouse trays, but I wanted a solution that included dirt, and I also wanted to be able to grow corn and pumpkins. What to do?

Before we moved in, we had asked the landlord here if he would be okay with us removing part of the back lawn and putting in a garden. He told us to just let him know our plans, but he agreed that it would be a better use of space. We had also run the idea by our nextdoor neighbor (we live in a duplex), and she said it sounded good to her.
On Friday, I was planting and watering in the back when the landlord came by to trim some bushes in the front yard since he's our landscape gardener as well as landlord. I asked him what he thought about a raised bed in a section of the lawn, and he immediately agreed and encouraged me to plant tomatoes. So just like that, we had his approval and began dreaming up what we would plant there.

After visiting garage sales with my sister Jeune Gal on Saturday for the neighborhood-wide annual garage sale weekend, we headed over to Home Depot (I know, the owner supports Trump but they were the only hardware store around that had the right lumber!). Green Guy was home sick with a cough, so it was just me and Jeune Gal in the enormous warehouse maze of Home Depot, looking for a whole lot of redwood lumber (which will last longer than other woods, but cedar would be even better), galvanized nails, hardware cloth for keeping gophers out, and ~30 cubic feet of soil. (A list of what we ended up using for the raised beds and cost is below.)
We found the lumber section and then couldn't find the dimensions we wanted, so a kind and strong employee helped us and lifted three 2x12'' 8 foot untreated redwood boards from the rack and set them in a huge cart for us. He checked all three boards and made sure they didn't have cracks or rot--he had to go through quite a few of them before finding three that were in good shape. After searching for a bit and getting lost a couple times (some of the Home Depot employees we talked to weren't all that helpful), we found galvanized nails designed for decks (but you'll found out later why we didn't use them). At this point, we checked out so we could see how much more room was left in the car before we got soil.

The boards fit in Green Guy's Montero, but they went all the way into the front cab of the car. They weren't anywhere near the gear shift and didn't interfere with my ability to see, so we just prayed they wouldn't go crashing through the windshield. It looked like we could still fit about 4 bags of raised bed/potting soil, so I went back in and bought them, along with some hardware cloth that I finally found in their fencing/chicken wire section. I lifted all four bags of soil by myself onto the cart, pushed it to the car, and lifted all four bags into the back. Whew, what a work out!

We made it safely home with our heavy load of materials to find that Green Guy had been shoveling in the back and removed all of the grass for us! I guess he was feeling better! Also, special thanks to my dad for letting us borrow his shovel.
The ground was rock hard, and we probably should have been watering the lawn for a few days before doing this project, but we didn't really know we'd be doing it on Saturday. Ideally, we would have dug into the soil to loosen it, but we didn't, and I suppose we'll find out if that was a mistake once we begin watering the bed.

Once we checked that most of the grass was pulled up, we attempted to level out the dirt somewhat. We weren't scientific about it since we don't own a level, but maybe we should have been. Most of the websites and videos I watched encouraged leveling to avoid uneven draining. Again, we'll see if we made a big mistake soon!
Then we laid out the hardware cloth, which will prevent gophers and other ground rodents from eating our veggies. I had some random tent stakes in my backpacking pack, so we used those to hold the corners of the hardware cloth down. (Note to self: Buy more tent stakes!) The reason why this step is so important is that my grandma told me a story about one time when she watched from her kitchen window as a gopher pulled her crop right into the ground. Imagine caring for a plant, watching it grow, dreaming about what it will taste like, and then seeing a thief yank it into its underground lair. Horrible!
When we went to lay out the hardware cloth, I realized I hadn't purchase enough (I got two rolls of 3' x 5'). If we had wire cutters, we could have cut some of the extra off one end to place in the gaps, but we don't own wire cutters. The visual of a gopher pulling our future corn crop into the ground was enough to make us agree to finish the project on Sunday.

Although we knew we couldn't pour the soil in until we finished lining the ground with hardware cloth, we decided to build the raised bed structure so it would be ready. Fortunately, our nextdoor neighbor happens to own an electric saw, so Green Guy carefully measured one of the redwood boards and cut it in half to make two 4.5 foot boards (the boards weren't exactly 8 feet as we found out, but since we measured it to cut it in half, rather than cut it to 4 feet, it didn't matter).

Then Green Guy began hammering the boards together, but it was so difficult and loud and pretty much impossible that he decided to go buy some screws. The neighbor with the saw also has a power drill, so when he returned from the store, he quickly screwed the whole raised bed together. It was so simple!


We may need to add a couple more bags of soil since it will compress when we water it, but it's basically ready for planting! It was a much simpler project than some websites made it seem. We didn't bury it into the ground or have posts that secure it down, but we don't think we'll need that. We plan to put gravel or rock around the edges to cover the dirt and extra hardware cloth. I can't wait to see it filled with plants!
I would encourage anyone with some extra space in their yard to build a raised bed. It was fun, easy, and didn't take all that much time. Below I'm listing the materials we used for this bed as well as some tips. If you have suggestions or ideas, please leave a comment!
Raised Bed Materials (4 x 8 ft) from Home Depot*
Green Gal
When we moved, we brought almost all of our plants from the previous place with us since most of them were in pots. Seeing all of the plants in a big pile made me realize how many plants I really have! It took multiple car trips to get them to the new place, and when we unloaded them, we set them on some cement along the side of the house. I rearranged them over the last couple weeks and have been watering them, but because they're on cement, they dry out much more quickly than when the plants were sitting on dirt previously. I put some of them on plant saucers or greenhouse trays, but I wanted a solution that included dirt, and I also wanted to be able to grow corn and pumpkins. What to do?

Before we moved in, we had asked the landlord here if he would be okay with us removing part of the back lawn and putting in a garden. He told us to just let him know our plans, but he agreed that it would be a better use of space. We had also run the idea by our nextdoor neighbor (we live in a duplex), and she said it sounded good to her.
On Friday, I was planting and watering in the back when the landlord came by to trim some bushes in the front yard since he's our landscape gardener as well as landlord. I asked him what he thought about a raised bed in a section of the lawn, and he immediately agreed and encouraged me to plant tomatoes. So just like that, we had his approval and began dreaming up what we would plant there.

This is what the backyard looked like when we moved in (it's a photo from the Craigslist ad). The smaller section of lawn on the right is where we put the raised bed.
After visiting garage sales with my sister Jeune Gal on Saturday for the neighborhood-wide annual garage sale weekend, we headed over to Home Depot (I know, the owner supports Trump but they were the only hardware store around that had the right lumber!). Green Guy was home sick with a cough, so it was just me and Jeune Gal in the enormous warehouse maze of Home Depot, looking for a whole lot of redwood lumber (which will last longer than other woods, but cedar would be even better), galvanized nails, hardware cloth for keeping gophers out, and ~30 cubic feet of soil. (A list of what we ended up using for the raised beds and cost is below.)
We found the lumber section and then couldn't find the dimensions we wanted, so a kind and strong employee helped us and lifted three 2x12'' 8 foot untreated redwood boards from the rack and set them in a huge cart for us. He checked all three boards and made sure they didn't have cracks or rot--he had to go through quite a few of them before finding three that were in good shape. After searching for a bit and getting lost a couple times (some of the Home Depot employees we talked to weren't all that helpful), we found galvanized nails designed for decks (but you'll found out later why we didn't use them). At this point, we checked out so we could see how much more room was left in the car before we got soil.

The boards fit in Green Guy's Montero, but they went all the way into the front cab of the car. They weren't anywhere near the gear shift and didn't interfere with my ability to see, so we just prayed they wouldn't go crashing through the windshield. It looked like we could still fit about 4 bags of raised bed/potting soil, so I went back in and bought them, along with some hardware cloth that I finally found in their fencing/chicken wire section. I lifted all four bags of soil by myself onto the cart, pushed it to the car, and lifted all four bags into the back. Whew, what a work out!

We made it safely home with our heavy load of materials to find that Green Guy had been shoveling in the back and removed all of the grass for us! I guess he was feeling better! Also, special thanks to my dad for letting us borrow his shovel.
The ground was rock hard, and we probably should have been watering the lawn for a few days before doing this project, but we didn't really know we'd be doing it on Saturday. Ideally, we would have dug into the soil to loosen it, but we didn't, and I suppose we'll find out if that was a mistake once we begin watering the bed.

Once we checked that most of the grass was pulled up, we attempted to level out the dirt somewhat. We weren't scientific about it since we don't own a level, but maybe we should have been. Most of the websites and videos I watched encouraged leveling to avoid uneven draining. Again, we'll see if we made a big mistake soon!
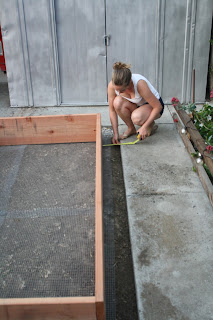
Then we laid out the hardware cloth, which will prevent gophers and other ground rodents from eating our veggies. I had some random tent stakes in my backpacking pack, so we used those to hold the corners of the hardware cloth down. (Note to self: Buy more tent stakes!) The reason why this step is so important is that my grandma told me a story about one time when she watched from her kitchen window as a gopher pulled her crop right into the ground. Imagine caring for a plant, watching it grow, dreaming about what it will taste like, and then seeing a thief yank it into its underground lair. Horrible!
When we went to lay out the hardware cloth, I realized I hadn't purchase enough (I got two rolls of 3' x 5'). If we had wire cutters, we could have cut some of the extra off one end to place in the gaps, but we don't own wire cutters. The visual of a gopher pulling our future corn crop into the ground was enough to make us agree to finish the project on Sunday.

Although we knew we couldn't pour the soil in until we finished lining the ground with hardware cloth, we decided to build the raised bed structure so it would be ready. Fortunately, our nextdoor neighbor happens to own an electric saw, so Green Guy carefully measured one of the redwood boards and cut it in half to make two 4.5 foot boards (the boards weren't exactly 8 feet as we found out, but since we measured it to cut it in half, rather than cut it to 4 feet, it didn't matter).

Then Green Guy began hammering the boards together, but it was so difficult and loud and pretty much impossible that he decided to go buy some screws. The neighbor with the saw also has a power drill, so when he returned from the store, he quickly screwed the whole raised bed together. It was so simple!

We would probably still be hammering the boards together if we had continued using nails...

...and this is why humans invented power tools.
Yesterday on my way back from working at UCSC's Commencement ceremonies, I stopped by Home Depot to get some more hardware cloth and soil. I'm getting pretty good at lifting huge bags of soil!
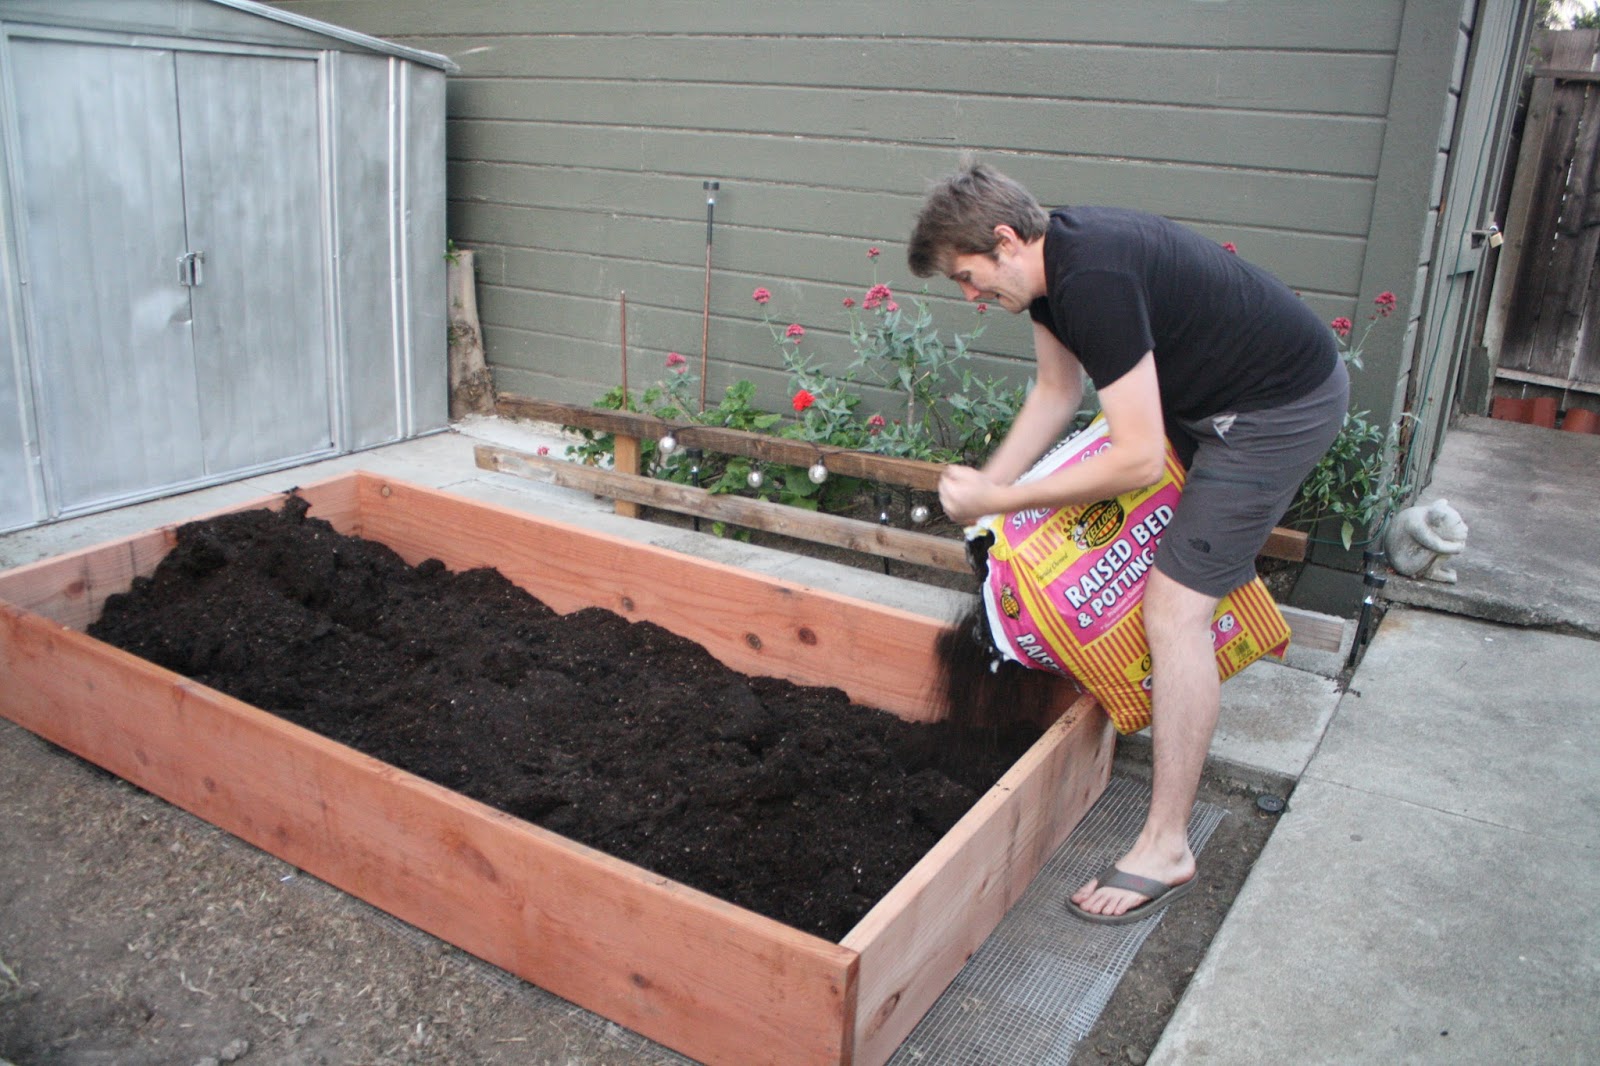
We laid out the rest of the hardware cloth, set the raised bed on top, measured it to make sure it was even with the edge of the concrete, poured in the soil, and leveled it out!


The view from our backdoor.
We may need to add a couple more bags of soil since it will compress when we water it, but it's basically ready for planting! It was a much simpler project than some websites made it seem. We didn't bury it into the ground or have posts that secure it down, but we don't think we'll need that. We plan to put gravel or rock around the edges to cover the dirt and extra hardware cloth. I can't wait to see it filled with plants!
I would encourage anyone with some extra space in their yard to build a raised bed. It was fun, easy, and didn't take all that much time. Below I'm listing the materials we used for this bed as well as some tips. If you have suggestions or ideas, please leave a comment!
Raised Bed Materials (4 x 8 ft) from Home Depot*
- Three 2 in. x 12 in. x 8 ft. Construction Heart S4S Green Redwood Lumber: $41.37 ea x 3 = $124.11
- California lumber fee for the boards = $1.23
- Two rolls of 1/2 in. 2 ft. x 5 ft. Hardware Cloth: $6.94 ea x 2 = $13.88
- Two rolls of 1/2 in. x 3 ft. x 5 ft. Hardware Cloth: $11.93 ea x 2 = $23.86
- Nine bags of 3 cu. ft. Raised Bed and Potting Mix Premium Outdoor Container Mix: $9.97 x 9 = $89.73
- (From Orchard Supply Hardware) One box of Exterior grade deck & fence screws, 8x3'' = $3.99
- You'll also need tent stakes or something similar to hold down the hardware cloth. We had some already, so we didn't need to buy them.
- Subtotal: $256.80
- Sales tax (8.75%): $22.47
- TOTAL: $279.27
- *Plan ahead and find out if there's a locally owned hardware store where you can get some or all of these materials. We were in a hurry to get the project done on Saturday, but in retrospect I would have felt better about shopping at our favorite farm supply store that's about an hour from here, even though it probably would have cost more.
- If you absolutely must shop at a big box store, consider placing your order online ahead of time. Since we got a late start in the day to do this, we wasted a lot of daylight searching around Home Depot.
- Be sure to measure the boards in the store and check for cracks or rot. Some of the boards that the employee pulled were actually 14'' not 12'', which wouldn't have been the end of the world, but would have been unnecessarily expensive.
- If you own or can borrow power tools for this project, do it. Nailing into and hand sawing redwood is really labor-intensive.
- Watch some videos as you're designing your raised bed. Sometimes the online descriptions can make this project sound much more complicated than it is.
Green Gal
What an exciting project! Your descriptions and the pictures make it look so simple, although I know a lot of time and effort go into work like this. It's very cool that the little patch of lawn was set off from the other patch, just begging to be made into a garden. I'll be excited to see the plants go into the bed and watch their progress. Thanks for sharing this fun project!
ReplyDelete